a. Navigate, Start Application> System Tools> Network Device Control
b. Select eth0 and click Activate
Once your network card adapter is activated, you can check your status.
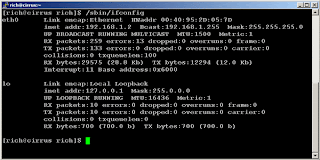
2. Just open a terminal then at the command prompt, key-in,
/sbin/ifconfig to see what the IP address is, and other information on your network card.

There are two sections - eth0 and lo.
- Eth0 is information about your network card. The second line in the eth0 section shows you the IP address assigned to that network card (in this case it's 192.168.1.2).
- lo is information about the loopback device (we won't go into this here).
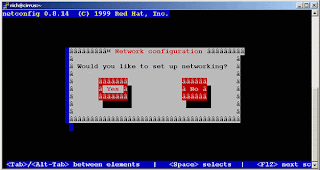
/usr/sbin/netconfig
You should get a GUI like this....

If you wish to continue, press ENTER.
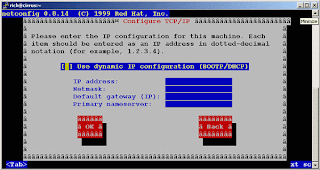
You will get a window where you can enter the address you want....

Check Use dynamic if you want your IP address assigned automatically. I recommend leaving it unchecked at this stage.
Type in an IP address
The netmask of 255.255.255.0 should work
Enter the IP address of the gateway you use, if you use one.
Enter the IP address of the DNS nameserver you wish to use.
Thats it.


1 comment:
If eth0 can't be activated, skip to Step 2 then 3, then back to Step 1. (This is experienced in RH Linux 9 Work Station type.
The above entry (original entry) is experienced in RH Linux 9 Server type.
Post a Comment